The Caladium genus isn’t the easiest houseplant to grow as it has a few special needs. The extra attention shouldn’t deter you from growing one as these houseplants show off eye-catching and unique foliage.
If you’re eager to grow a thriving Caladium then look no further because we’ll go through everything that you’ll need to know. In this care guide, we will touch on its key characteristics, care needs, how to grow it, and finally how to revive a dying one.
Table of Contents
Main Features
The Caladium genus is also commonly referred to as elephant ears. It should be noted that this group of plants isn’t the same as the popular elephant ear plant. This houseplant belongs to the same family as the calla lily; the Araceae family.
It is a tropical perennial that absolutely loves a warm and humid environment. It’s native to rainforests in South America so you’ll need to try to replicate these conditions for it to flourish.
It sprouts vibrant foliage that is either heart- or arrow-shaped. They come in an array of colors and a variety of shades of pink, red, white, and green. These colorful leaves will differ across the multiple species which we’ll be chatting about below.
Caladium Varieties
The shape, pattern, and color of a plant’s foliage are dependent on the species of Caladium. There are many types of this houseplant but we’ll only touch on some of the most common and gorgeous varieties below.
- Caladium ‘heart of Jesus’: It is also known as the Caladium bicolor as its foliage comes in an array of colors and patterns. Typically, they sprout heart-shaped leaves with multiple patterns and color combinations.
- Caladium ‘red flash’: Its heart-shaped foliage has dark green edges with bold red veins which are accompanied by pretty pink specks.
- Caladium ‘moonlight’: This type produces large white leaves with light green veins and margins. The vibrant white color almost gives off a moonlight-like glow.
- Caladium ‘white Christmas’: It grows olive-green and arrow-shaped leaves that are decorated with tiny white specks that resemble a light dusting of snow.
- Caladium ‘Aaron’: This variation has long, arrow-shaped foliage in shades of light and dark green. They are also decorated with creamy-white veins.
How Big Do They Get?
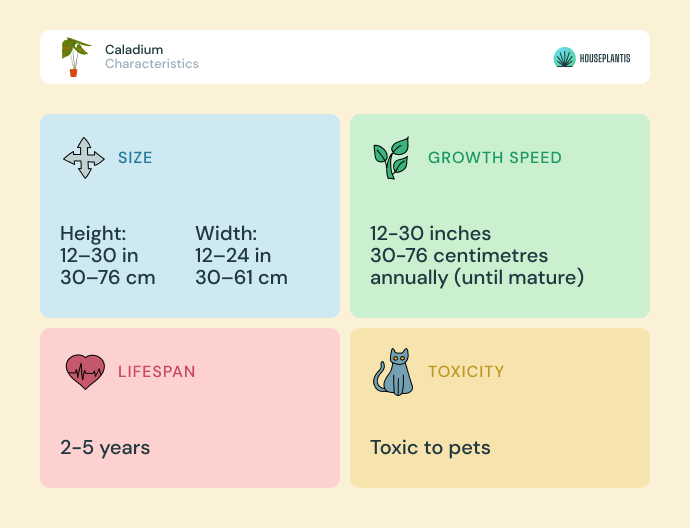
A healthy houseplant will grow around 12 to 30 inches (30.5 – 76cm) tall. It’ll also produce a width of around 12 to 24 inches (30.5 – 60cm).
How Fast Do They Grow?
Typically, this houseplant sprouts new growth at a rapid pace as it can reach its mature size in just one year. So, you can expect it to grow 12 to 30 inches (30.5 – 76cm) tall within its active growing seasons.
Lifespan
It isn’t regarded as a houseplant with a long lifespan even when grown in optimal conditions. It will usually only live for between 2 to 5 years.
Toxicity
Just like the swiss cheese plant, this plant contains insoluble calcium oxalate crystals. When ingested these cause tiny tears as it penetrates the tissue and causes oral irritation. These crystals are found in the plant’s leaves and stems.
We’ll discuss what symptoms to look out for if either a pet or person ingests the plant.
Are They Poisonous to Dogs and Cats?
Its sap is toxic to both cats and dogs. The sap can also cause a small, red rash if either of your pets comes into contact with it, however, the major concern is if they ingest it.
Here’s a shortlist of signs that your pet has eaten the plant’s stems or leaves:
- Pawing at the face
- Swelling of the mouth and throat
- Stomach pain
- Excessive drooling
- Nausea
- Vomiting
It’s important to contact your vet to determine the best course of action. You should seek out this advice immediately to avoid any further harmful effects.
Are They Poisonous to Humans?
The crystals found in its sap are toxic to people too. Even touching the sap while handling the plant can cause skin dermatitis. If you consume any part of the houseplant then are a few negative side effects too.
Below, we’ve listed the most common symptoms:
- Swelling of your lips, tongue, and mouth
- Nausea
- Vomiting
- Gastrointestinal irritaion
- Difficulty swallowing
Always contact a medical professional if any of these symptoms persist for an extended period of time.
Top tip: You must wear a pair of gardening gloves before pruning, repotting, or propagating the plant.
Caladium Care
The Caladium has a few specific care requirements especially during winter as it enters a period of dormancy. We will go through how to water, prune, repot and overwinter it. Additionally, we’ll describe how to create the best environment for it to thrive.
How Often to Water It
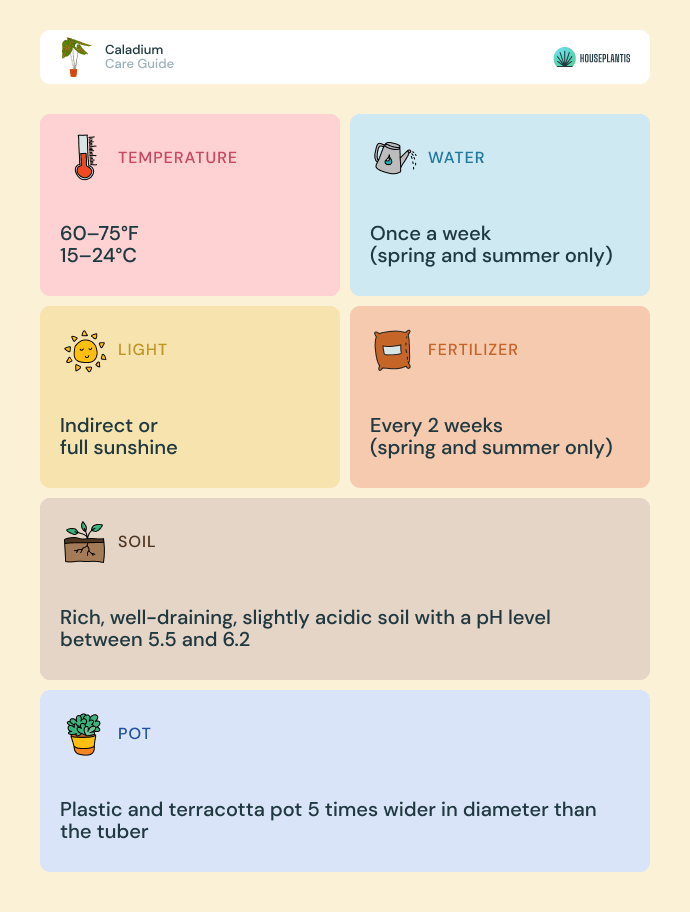
The Caladium should be grown in evenly moist potting soil. Typically, you should water it once a week during the spring and summertime.
The soil should never be left to dry out, so it’s best to water it once the top 25 percent of the soil is dry to the touch.
During autumn and winter, you should refrain from watering it. The leaves will begin to drop during autumn as the plant prepares for its dormancy period in winter. Once the leaves start to fall off then you can stop watering it.
Furthermore, as spring arrives again then you will need to water the Caladium to “wake” it up.
Drainage
Drainage is imperative for the Caladium to survive, just like the Cyclamen. There are two major ways to encourage adequate drainage; planting it in well-draining soil and choosing a pot with drainage holes.
If you’re concerned that your plant may become waterlogged then add a layer of gravel or clay stones at the bottom of the container. Simply, fill the bottom with a 3-inch (7.6cm) layer of gravel before planting the Caladium.
Top tip: Always remember to empty the drainage tray otherwise excess water may build up and form a puddle underneath the plant.
Cutting Back
It’s best to trim off any dying, damaged, or unhealthy foliage during winter and autumn. You should only prune the plant sparingly during the spring and summertime. Most of the leaves will drop off as the plant becomes dormant during the wintertime, however, it’s a good idea to prune it too.
Follow the steps below:
- Clean your pair of pruners or shears with a rubbing alcohol mixture.
- Snip off the stem right at the soil line.
- Water the plant if necessary and place it back in its original position.
Transplanting
Every 2 to 3 years you should transplant the Caladium to a larger container. You only need to go up one size as it shouldn’t be planted in a pot that’s too big.
It is best to do this during the springtime as cooler temperatures may shock the roots.
Here’s a step-by-step guide:
- Slide it out of its current pot and dust off the extra soil surrounding the roots.
- Check that the roots are healthy and cut off any damaged tissue.
- Prepare a new pot by filling it one-third of the way with fresh soil.
- Now, you can plant it and make sure that the roots are fully covered.
- Water the houseplant well to help its roots settle.
How to Overwinter It
This houseplant is not frost tolerant and if you live in a particularly cool region then you’ll need to treat it differently during the wintertime.
As the plant becomes dormant during winter, you will need to make sure that any foliage that is yet to drop is removed. Additionally, you should find a warm home for it as temperatures begin to drop below 50°F (10°C).
It’s a good idea to add a thin layer of mulch on top of the soil as this will further protect the plant from the cold. Furthermore, you shouldn’t water it during the winter as it will become waterlogged.
Environment Conditions
Sun or Shade
It loves growing in either indirect or full sunshine. Bright light is vital for it to grow healthy and colorful leaves.
During the morning it should receive at least 1 to 2 hours of full sunlight, and in the afternoon it must be positioned under indirect light.
Best Soil Mix
The Caladium prefers slightly acidic soil with a pH level between 5.5 and 6.2. The potting mixture should be rich and well-draining too.
To ensure that the plant receives all of the nutrients it requires, you should add some compost to the potting mixture. Organic matter like this will make the soil more fertile which encourages growth.
Top tip: A great combination is 6 parts compost, 1 part orchid bark, 2 parts perlite, and 1 part sphagnum moss.
Can It Grow in Water?
A Caladium tuber can be grown in a jar or vase of cool water. It makes for the perfect decorative piece and is a great way to show off its stunning foliage.
You’ll need to use non-chlorinated water as the roots are sensitive to chemicals found in tap water. Additionally, you should replace the water once a week or when it becomes murky.
Fertilizer
The Caladium is a heavy feeder and should be fertilized once every two weeks during its active growing seasons. If you feed it during autumn and winter then you’ll risk over-feeding it and too many salts will build up in the soil.
To grow strong and vibrant foliage you can use a liquid and water-soluble fertilizer with a ratio of 5-10-10 or 20-10-10.
Pot Size and Type
The exact size of your container will depend on the size of the tubers or the number of bulbs planted in one pot. Typically, the pot must be five times wider than the tuber.
Both a plastic and terracotta pot are suitable for this plant. The only requirement is that the container must have at least one large drainage hole.
Temperature Tolerance
The optimal temperature for this houseplant ranges between 60 to 75°F (15.5 – 24°C). It can tolerate cooler temperatures around 50°F (10°C) and even temperatures as high as 90°F (32°C).
Humidity
The houseplant will thrive when grown in a moist environment with a humidity level between 50 and 60 percent.
It’ll benefit from regular misting during the spring and summertime. You can also increase the humidity level surrounding it by placing an electric humidifier nearby.
Outdoors vs. Indoors
The Caladium is fussy when it comes to the care it requires so it’s best to grow it indoors as it’s easier to control the environmental conditions. If you live in USDA hardiness zones 9 to 11 then your plant will prosper outdoors.
When it’s planted in your garden you should choose a partially shady location for it as the harsh sunshine will scorch its gorgeous foliage. Additionally, you should ensure that it is grown in a warm area. You’ll also need to ensure that the environment is humid and moist too.
The Caladium may even benefit from bright light and natural rainwater when grown outdoors, however, you’ll need to water and feed it more often as well.
Do They Bloom?
Typically, the Caladium is unlikely to flower when grown indoors. In its native environment, it will bloom a trumpet-shaped spathe with a spadix during the spring, summer, or autumn.
These flowers can be either pink, green, white, or red and only last for about a week before dying. Usually, only a single flower will bloom as two or more is very rare.
If you want to encourage it to flower then you’ll have to create the perfect environment. This means that you’ll need to feed it regularly, grow it in well-draining soil, and make sure that it soaks in bright sunlight.
Some gardeners even prefer to snip the spathe off as soon as it emerges. This will allow for more energy and nutrients to be directed to growing healthy foliage.
How to Grow It
You can expand your collection of houseplants by either propagating it or planting its seeds. The best time to carry out each method is during the springtime as it’ll need plenty of sunshine.
Propagation
The Caladium can be propagated in both soil and water. Before we explain how to carry out the various methods, always clean your tools. This will ensure that no bacteria or diseases are spread from one plant to the other.
Propagating in Soil
You can propagate a plant’s bulb or tubers in quick-draining soil. Make sure that the potting soil is fertile too because this will encourage healthy growth.
Planting Its Bulbs
Bulbs can be found under the soil when the plant is mature. These can then be planted in their own pot and will form a new houseplant.
We’ll explain how to store the bulbs, when to plant them, and how to plant them as well.
How to Store the Bulbs
During the wintertime, you will need to store the bulbs retrieved in the soil. All you will need to do is place them in a tray of dry compost or wrap them in some newspaper. Additionally, the bulbs must be left in a dark, dry, and frost-free room.
They should at least be allowed to dry out for one week.
When to Plant the Bulbs
After the bulbs have had some time to dry out, you can plant them in the springtime. This will ensure that it receives plenty of warm and bright sunshine.
How to Plant the Bulbs
You can plant the bulbs now that you have stored them and springtime is near. We’ll tell you exactly how to do this below.
- Fill a new container with moistened potting mixture.
- Plant the bulb so that its tiny roots are under the soil, and the top half is exposed to bright light.
- Mist the bulb frequently and wait until new growth sprouts from it.
- In 4 to 6 weeks new growth will emerge and you can treat it like would care for a mature plant.
Growing Rooting Tubers in Soil
This process will involve dividing the plant during the winter and storing the tubers until the springtime.
Follow the steps listed below:
- Remove the tubers from their container and place them in a dark room until springtime.
- Once it’s warmer, you will need to cut them into separate divisions.
- You can then allow the cut areas to callus over by storing them in a warm and dark room for 24 hours.
- Prepare a new container with potting mix and plant each division.
- Water them regularly to keep the soil moist and position it under bright sunlight.
- The roots should establish themselves in 3 to 4 weeks.
- You can then care for them as you normally would and repot them when they’re big enough.
Propagating in Water
The tubers can be propagated in water before being repotted in soil. This is a fairly easy and simple method to carry out too. We’ll guide you through it below.
- Lift the tubers out of the pot and store them in a cool and dark place.
- In the springtime, you can cut the tubers into different sections. Each section must have at least one growing site.
- Now, you must store these sections in a dark and warm room so that the cut area can callus over.
- Fill a glass jar with distilled water and place the tubers inside of it.
- After about a month you should notice new root growth, and then you can transplant them into soil.
Seed Planting
Planting its seeds is not a highly reliable or successful method, however, it is fun. You can purchase these seeds from your local nursery.
We’ve put together a simple guide below:
- First, you must soak the seeds in a bowl of distilled water overnight. You should do this as it will assist in germination.
- Fill a shallow tray with moistened peat moss and compost.
- Sprinkle the seeds across the soil and mist them lightly.
- Cover the tray with a plastic bag to create a moist and warm environment. Additionally, the seeds should be positioned under bright light.
- After two weeks you can remove the plastic bag as new growth should have sprouted.
- In two months you will need to transplant the seedlings as they will become too large for the current tray.
How to Revive It
The Caladium will run into numerous health issues when it’s grown in improper environmental conditions. We’ll discuss why your plant’s foliage is either droopy, yellowing or turning brown. Then we will go over what you can do to revive it.
Why Is It Drooping?
Droopy and limp foliage occurs when the plant is watered improperly, placed in a shady area, or if it is too cold.
When your plant is either over- or underwatered then its health will be negatively impacted. You must always check whether the soil is wet or dry before watering it. If it’s dry then water it well whereas if the potting mix is too wet then wait until it is slightly dry.
The plant thrives in bright light. You can ensure that it receives plenty of sunshine by positioning it under indirect or full sunlight.
This houseplant cannot tolerate the frost. So, when temperatures begin to dip, you must locate it in a warmer region.
Yellow Leaves
Foliage will yellow when the houseplant is stressed, watered incorrectly, or if it is receiving too much direct sunlight.
Sudden changes in temperature and humidity will stress your plant. You will need to maintain a consistent environment if you wish for it to thrive.
Over- or underwatering your plant is a problem. Always stick to a good watering schedule and make sure to only water it when the top soil is dry.
During the summertime, the sunlight may be too harsh for your plant. If you suspect that its leaves are scorched then simply place it under bright, indirect sunlight.
Brown Foliage
The leaves will become brown for numerous reasons. The main causes are a lack of humidity and water, too much light, or the plant being over-fed.
A lack of moisture can be detrimental to its health. The best way to rectify this issue is by watering it regularly and misting its leaves a few times a week.
In the summer the sun’s rays are too harsh and will burn its foliage. You should find an area where it’ll only receive indirect light if this occurs.
If you have over-fertilized the houseplant then you’ll need to flush its soil. You can do this by running a gentle stream of water over the soil for 15 minutes.
Concluding Thoughts
The Caladium genus is worth all of the extra care and attention it requires. Once you have nailed down its basic care needs then you’ll be gifted with eye-catching and beautiful foliage.